You may have missed the recent changes to Cash Management in Microsoft Dynamics NAV 2013 R2.
In Microsoft Dynamics NAV 2013 R2 there is a great new way to apply incoming customer payments.
The Payment Registration window displays all open sales documents that are due for payment. It’s an excellent way to simply tick and post incoming payments without needing to enter a cash receipt journal and manually select the customer and manually apply to invoices.
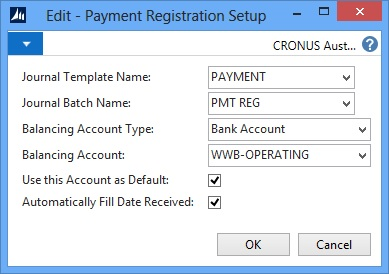
Once you setup the bank account to use, and what receipt journal to process with, you can start sorting and registering the payments.
Image 1: Screenshot of setup window
In the Payment Registration screen you can choose to sort by any column, e.g. customer name, and then tick multiple invoices to receipt.
Once ticked, it can default to today’s date and the remaining amount but you can modify the Date Received, and Amount Received fields to reflect the actual cash situation before posting a payment.
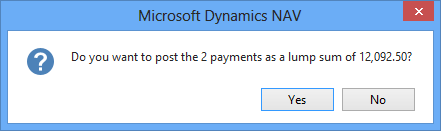
You can also choose to Post as Lump Payment which will create one bank ledger entry to match your bank statement.
Image 2: Payment Registration Window
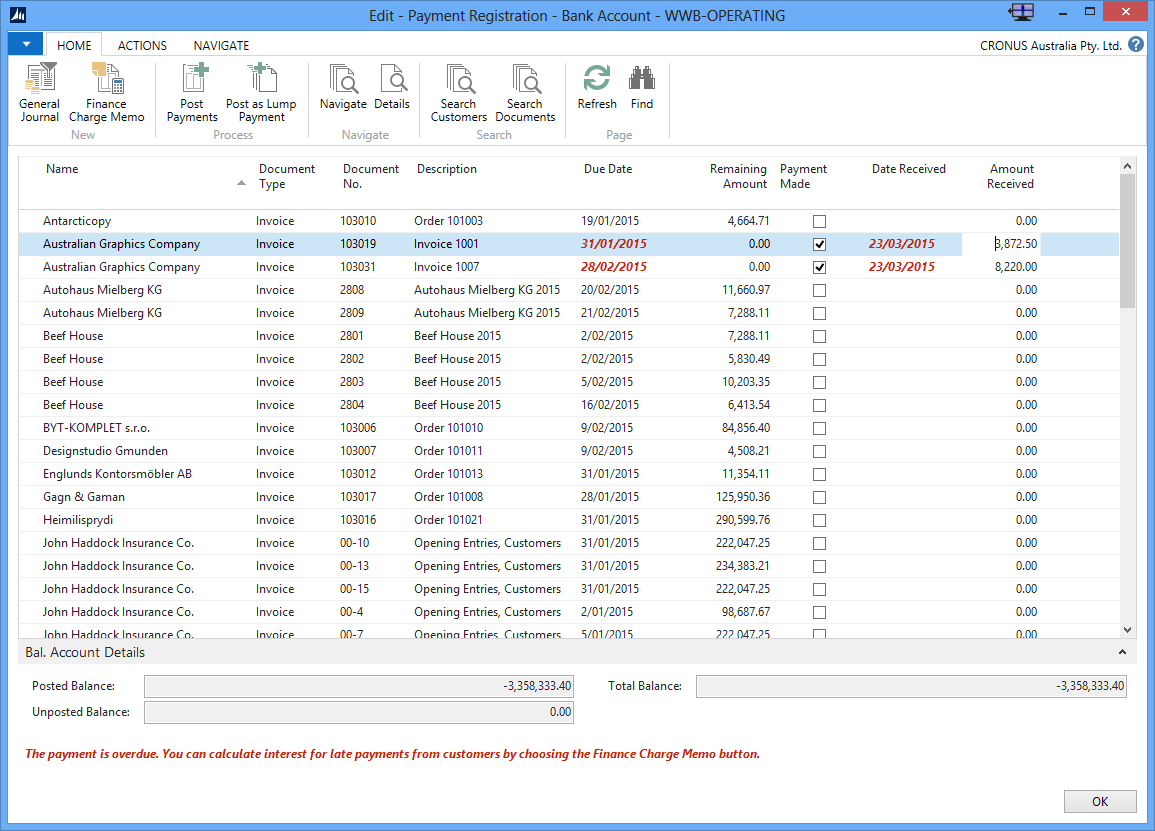
Image 3: Confirmation of lump sum total
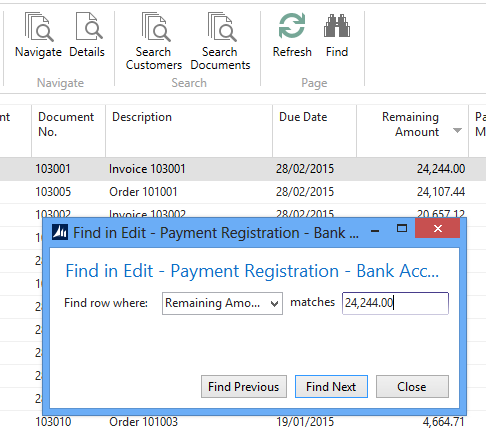
Stuck with a payment from an unidentified customer on your bank statement? Don’t fear, you can easily search by that amount in the screen and even sort by the amount column.
Image 4: Search by any column and change sorting
Too manual for you?
Then take it to the next level using Automatic Payment Processing. In NAV 2013 R2 you can use an automatic application function in the General Journal window. You can specify rules that map payments to debit or credit accounts according to text found in the payment description.
More on this in my next blog. Stay tuned!
Finally, please watch my short video demonstration – Payment registration process in action.